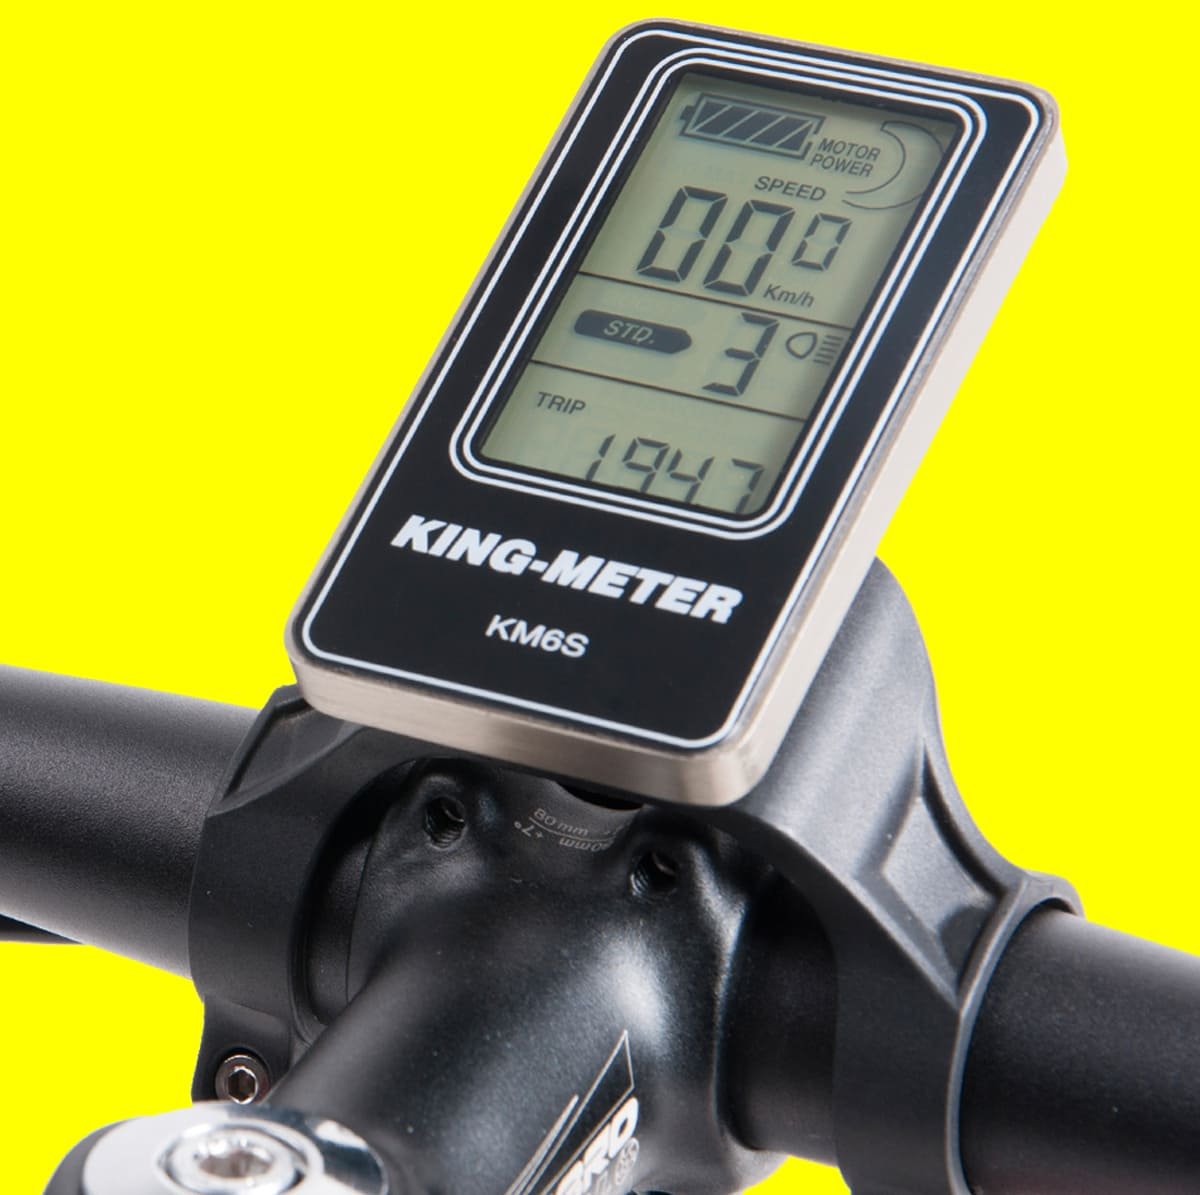
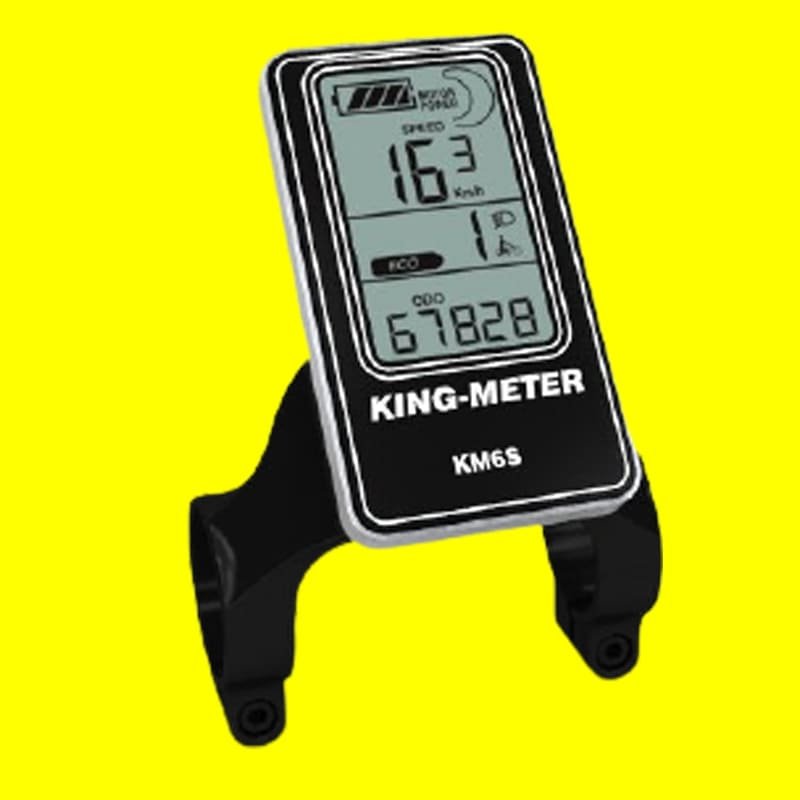
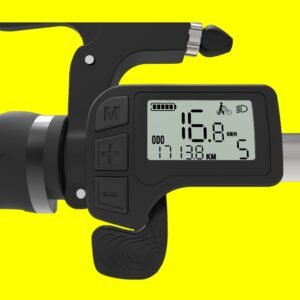
KM6S-U LCD Display
Vertical middle-mounted LCD display. It’s centrally positioned on the handlebar for a more clear view and quicker focus, equipped with a special remote for separate and safety control when you riding.
Additional information
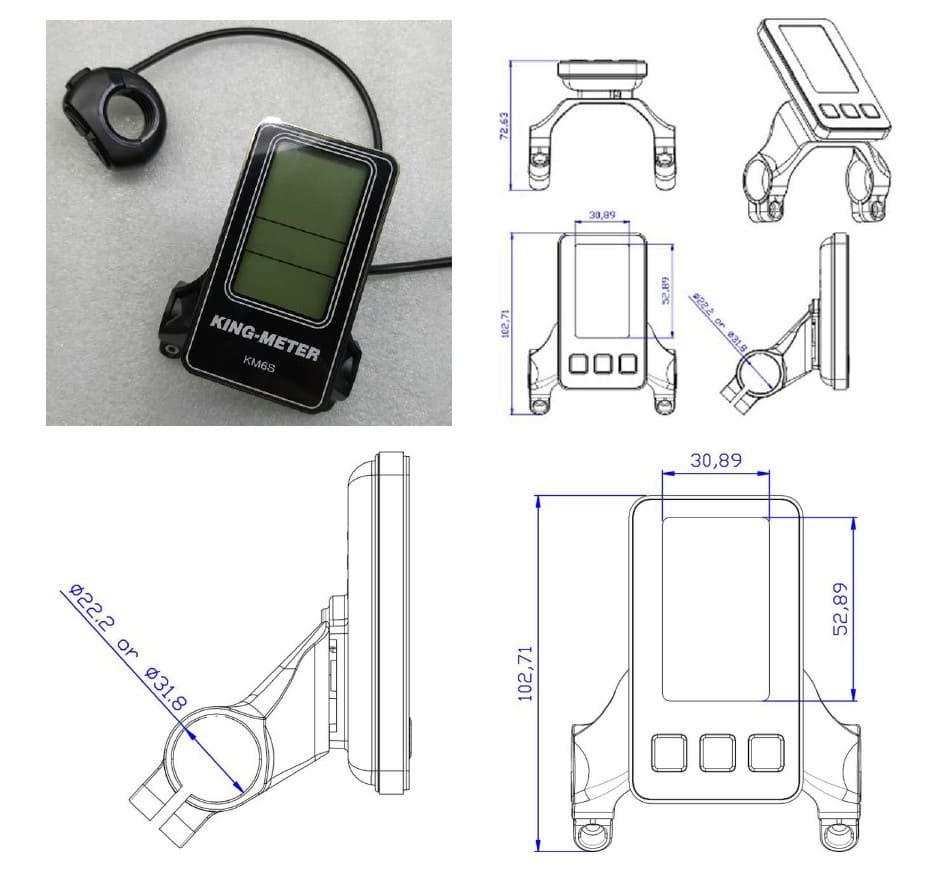
| Size | 102.7mm * 83.7mm 72.6mm |
|---|---|
| Function | Battery, Headlight, Mile/KM, ODO, PAS Level, Speed, Trip, Trip Time, Walk Assistance, Watt |
| Communication | CAN BUS, LIN, UART |
| Holder | 22.2mm, 25.4mm, 31.8mm, Integrated Stem |
| Voltage | 24V, 36V, 48V |
| USB Charging | 5V/500mA, Without |
| Certificate | CE, EN15194:2017, IPX6, RoHS |
KM6S-U eBike LCD Display_User Manual_TopEParts
Dear user,
To ensure the best performance of your e-bike, please read through the KM6S product introduction carefully before use. This user manual covers: Hardware installation, setup, and normal operation. It will also help to limit any confusion and assist in you resolving any malfunctions.
1. Appearance and Size
1.1 Material and Color
KM6S-LCD housing material is made from PC plastic with a working temperature range of -20℃ to 60℃. The color can be either white or black. This material ensures the good mechanical performance of the product.
1.2 Display Dimensions and Installation(unit:mm)
2. Function Summary and Button Definitions
2.1 Function Summary
KM6S offer many showing items to meet users’ needs, which contains the content below:
- Battery indicator
- Power of the motor
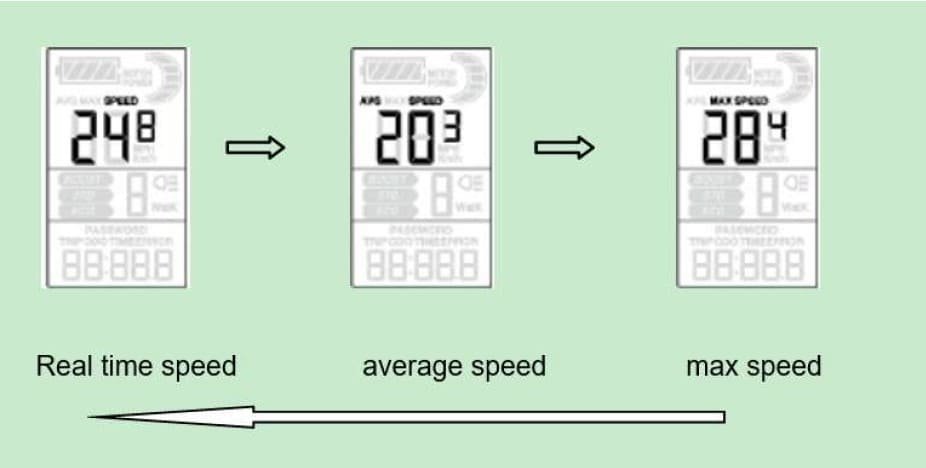
- Speed (real-time speed, max speed, and average speed)
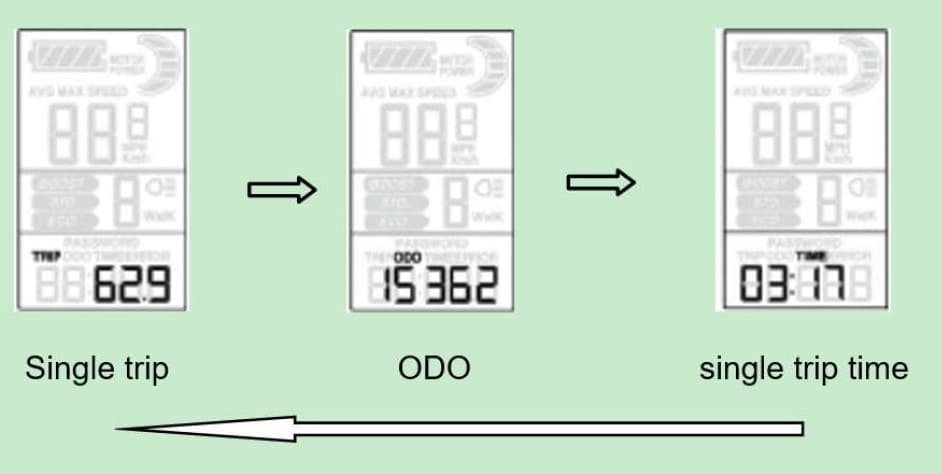
- Trip distance(single trip and ODO)
- Single trip time
- Push cruise
- Backlight starting
- Error code
- Multi-parameter
- Restoration of the default setting
2.2 Button Definition
KM6S-LCD is equipped with a 30-button unit and an N3 button. This button is suitable for both left and right-hand operations. Button dimensions are as follows (mm):
2.2.1 30-button unit:

The 30-button unit is connected to the bottom of the KM6S-U ebike LCD display via a cable.
In the following introduction, [MODE] is “MODE”, [UP] is “UP”, and [DOWN] is “DOWN”.
2.2.2 N3-button unit:
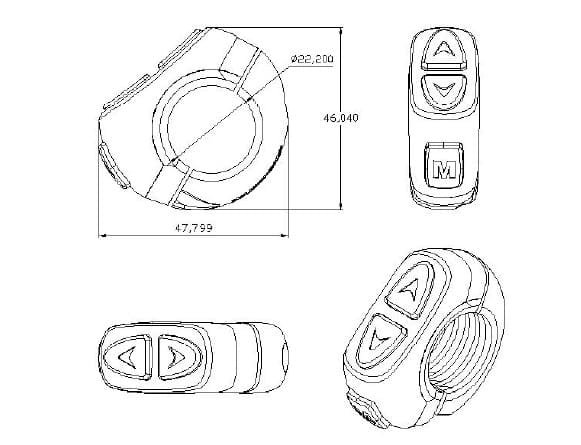
N3-button unit is connected to the bottom of the KM6S-U eBike LCD display via lead cable.
In the following introduction, [MODE] is named “MODE”. [UP] is named “UP” and [DOWN] is named “DOWN”.
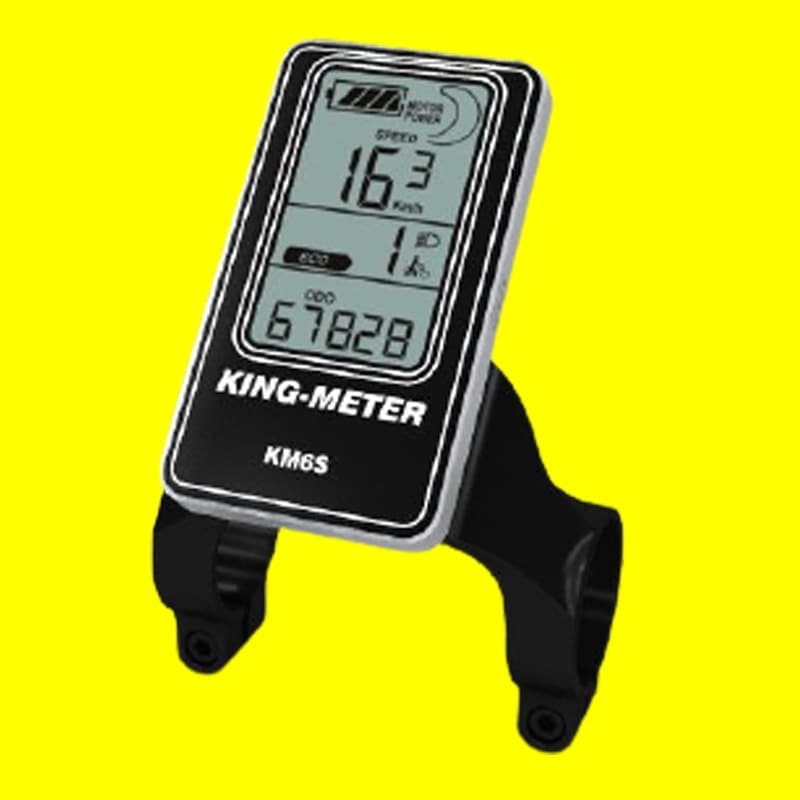
2.3 Display Screen Info
3. Precautions for users
Please do not connect and disconnect the display when you are using it. Please always care about safety.
- Please keep the display away from impact and hit.
- Please do not take off the stickers which are waterproof.
- Please do not change the parameters concerning the background in case of malfunction.
- Please send the malfunction display to the retailer for repair once the malfunction occurs.
4. Installation Instruction
Fix the display and 30-Button unit or N3-Button unit on the handlebar and adjust it to an appropriate visual angle. Match display connector with controller connector.
5. Standard operation
5.1 Turn on/turn off
Long press “MODE” to power on the display, which also powers the controller and unlocks the power key of the controller. At the working state, long press “MODE” to power off the display. After shutting down, the display does not use the battery and the current leak is less than 1uA.
Note: If the bike stays alone and no operation from users, it will shut down automatically over 10 minutes.
5.2 Working interface
After the display is on, it shows real-time speed as default. Long press MODE&DOWN to switch the showing. It is as below in turn: real-time speed (Km/h), average speed (Km/h), max speed (Km/h), and real-time speed (Km/h)
After the display is powered on, it shows the single trip distance as default. Short press the MODE button, then switches to other parameters. It is as below in turn: single trip, ODO, single trip time.
5.3 Push cruise control
Press DOWN for 2 seconds, the system enters walk assist mode. The E-bike will move at 6km/h and shows walking on the screen.
Please note this function can only be used when users push the E-bikes. Please do not enable it when riding.
5.4 Backlight brightness
Press the UP button for 2 seconds, then starts the backlight and headlight. When the light is short at night, please turn on the backlight. Press the UP button for 2 seconds again, and then shut the backlight.

5.5 PAS level setting
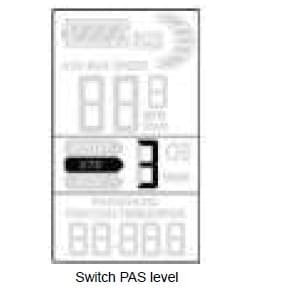
Short press UP and DOWN, then switch the PAS level and change the outputting power of the motor. The range is level 1- level 5, with level 1 as default.
5.6 Battery indicator
When the battery is full, 5 bars are on. When the symbols flash, it means the battery is short of power severely and needs to be charged soon.

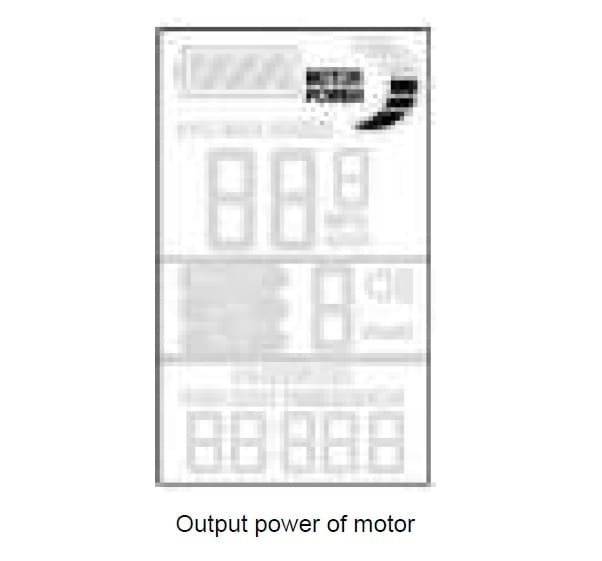
5.7 Power showing
The display can show the real-time output power of the motor as below:
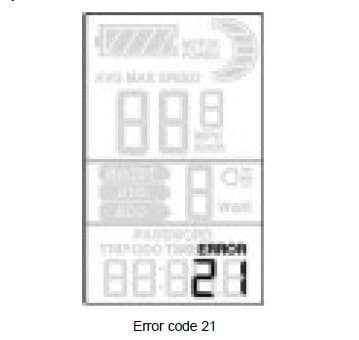
5.8 Error code
When the electric system is working wrongly, the display will show an error code automatically. Please find attached list 1.
Only when the problem is solved, the display can go back to the normal interface. The bike cannot work normally if a faulty one occurs.
6. Users ‘setting
Long press MODE, and then start the display. Hold UP and DOWN for 2 seconds, display goes into setting mode.
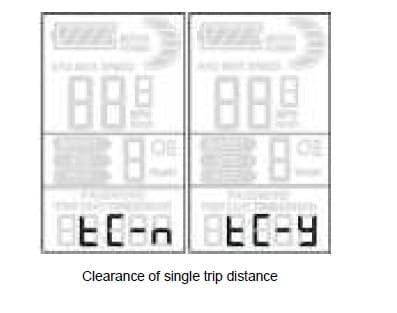
6.1 Clearance of sing trip distance and single trip time
TC means clearance of single trip distance, with option N/Y. by pressing UP and DOWN to choose Y/N. Default N means no and Y means Yes. A short press on MODE and then enter wheel size setting.
Single trip distance and single trip time will be cleared at the same time.
6.2 Wheel size setting
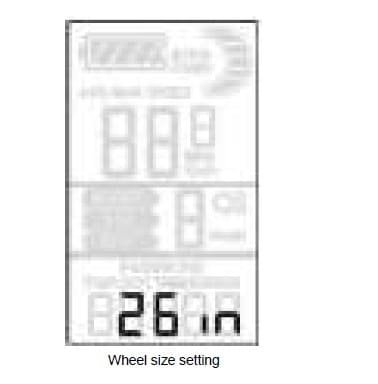
The options are as below: 8inch, 10inch, 12inch, 14inch, 16inch, 8 inch, 20 inch, 22 inch, 24 inch, 26inch, 700C, 28inch.
Choose the right wheel size by pressing UP and DOWN, in order to get the exact speed and distance. The default wheel size is 26inch. Short press MODE then enters into speed limited setting.
6.3 Speed limited setting
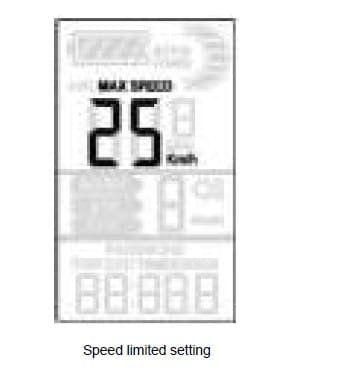
The max speed as the default of the display is 25Km/h. changing this value can set the highest speed. When E-bike runs over the setting, the controller will cut off the power to the motor to ensure safety.
The range of optional speed limits is from 12Km/h to 40Km/h. user can set the value by pressing UP and DOWN.
6.4 Backlight brightness
BL means backlight. The optional range is from 1 to 3, which means different brightness. The default setting is 1.
You can choose from level 1 to level 3. Level 1 is the minimum brightness and level 3 is the maximum brightness. Short Press MODE and then confirm the backlight brightness and enter into the interface of the unit.

6.5 Choice of Display Unit(metric &imperial)
Please press UP and DOWN to choose the unit. The optional units are Mike and km. The unit of speed and the unit of the trip would keep the same. Long press MODE to confirm and then exit from setting.
6.6 Exit
At setting parameter state, short press MODE to confirm and enter into the next setting. Long press MODE and then save and exit. Long press DOWN and then abandons the current operation, exit from setting, and does not save current setting data.
If no operation within 1 minute, the display will exit from setting mode.
6.7 USB charging (displays with USB port)
The display is with a USB port, used for mobiles, outputting 5VDC/500mA. When the display is shut, connect the mobile and USB port, then the displays show USB every 3 seconds to indicate the working state. If you shut the display at this moment, the USB still works. Charging stops at any time you plug out your mobile phone.
7. FAQ Answers
Q: Why I can’t turn on the display?
A: Please check if the cable is well connected with the controller.
Q: How to deal with the error code display?
A: Contact the e-bike maintenance station in time.
Q: what caused the malfunction when it shows error 30 on the display?
A: That means the abnormal communication between display and controller. Please try the suggestions below. If not helpful, please send the display to retailers or contact us:
1. The connecting of wires between controller and display is correct or not, in case of cracking or disconnecting.
2. The communication protocol is the same or not.
Please change the display or controller. If that works, it means the replaced part is with the problem.
8. Quality and warranty scope
1. We are not responsible for the scratched or broken shells after the products are delivered out of the factory. We don’t repair scratched or broken lead wires.
2. The LCD display function warranty: 24 months from the shipping date of the display out of the factory.
The following circumstances are not covered by the Warranty.
1. Opened case
2. Damaged connector
3. Scratched or damaged case after delivery
4. Scratched or damaged cables
5. Malfunctions or damage caused by force majeure or natural disasters
6. outside the warranty period
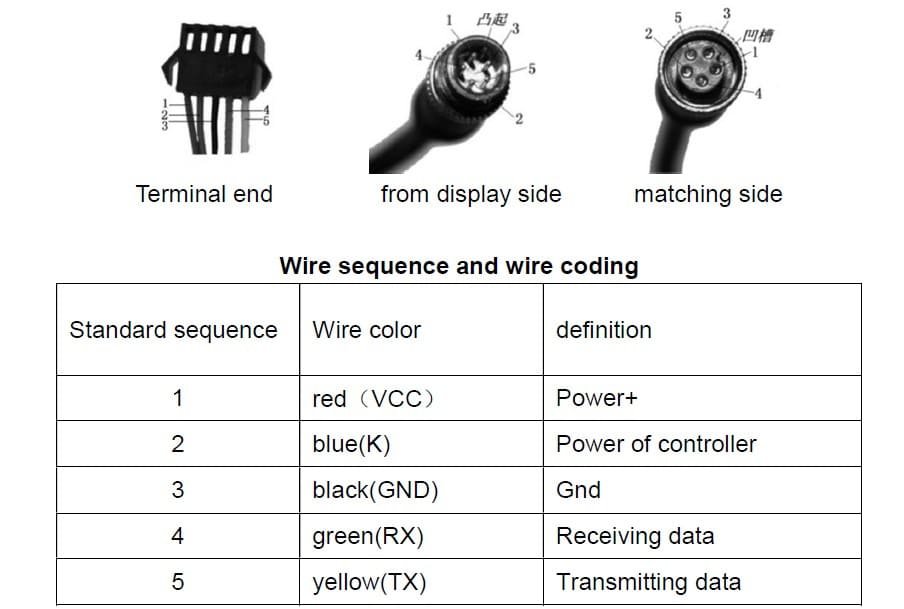
9. Cables layout
Standard connector and wire sequence
Notes: some displays are with waterproof cables, and wires hidden inside the wire cover.
10. Software Version
This operating instruction is general-purpose software (version V1.1). Some of the versions of the e-bike LCD may have slight differences, depending on the specialized display.
11. Appendix 1: Error Code
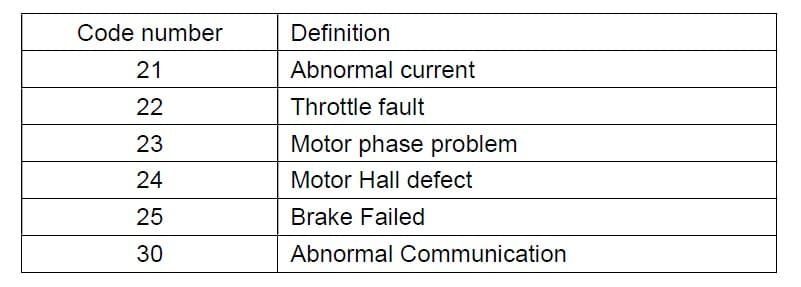
Note: Here is a more general error code for different e-system for your reference.

