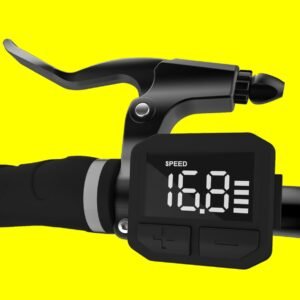
SW-H housing material: PC. And the color of the housing is white or black. Working temperature scope: -20℃—+60℃, the shell material can ensure the normal use and good mechanical performance of the products.

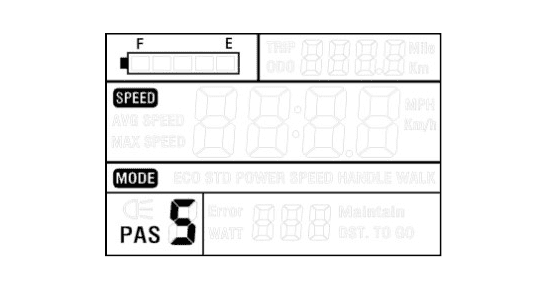
SW-H offers plenty of functions and showing, in order to meet your needs:

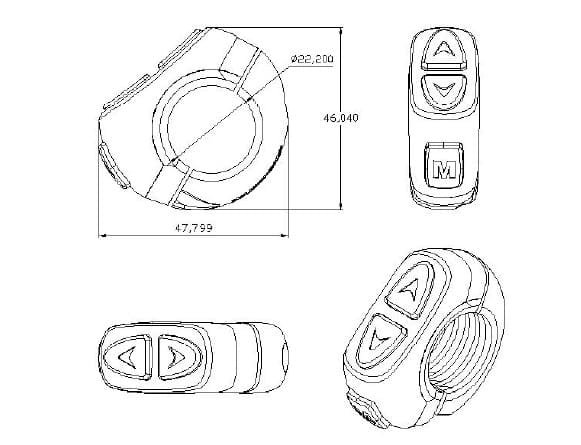
SW-H can be equipped with both a 30-button unit and N3- button. The two operating buttons are suited for both L/R hands, button figures are as follows:

30-button unit is connected to the bottom of the SW-H display via lead cable.
In the following introduction, “MODE” is named “MODE”. “UP” is named “UP” and “DOWN” is named “DOWN”.
The N3-button unit is connected to the bottom of the SW-H display via a waterproof cable.
Please follow the operation steps and do not plug in and out at the working state.
Fix the display on the handlebar, and adjust the angle. Connect the two plugs from the display and controller when it is off the power supply.
Press Mode to start the display and supply power to the controller. When at working state, press and hold Mode to shut off the display. The display does not use power and the leak of current will be less than 1uA.
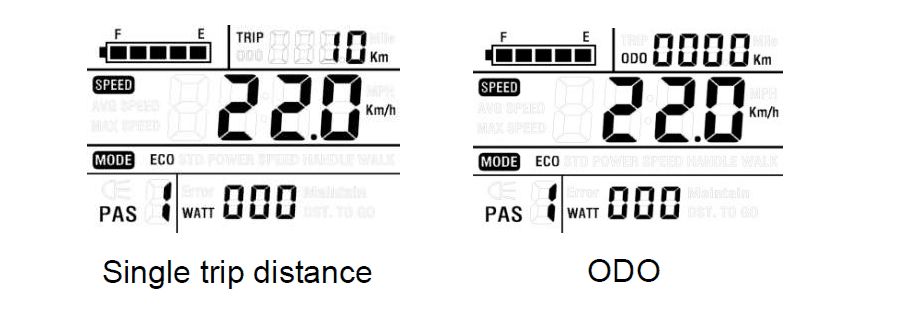
After starting the display, it shows the current speed first. Then it shows ODO (unit: km), single distance, and ODO by pressing Mode to switch the data.
Press and hold Mode and Down to switch the interface. It shows as below in turn: current speed, average speed, Max speed, and then back to the current speed.

Press and hold DOWN for 3 seconds to start walking assist. The bike will output 6km/h.
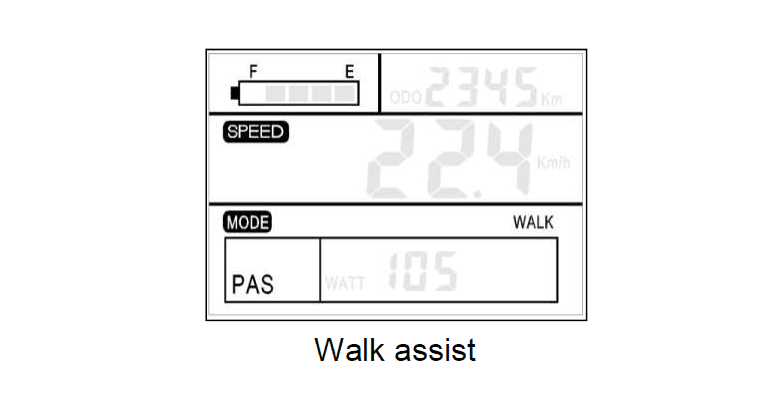
Walk assist can only be working when you push the bike and please do not start this function when riding.
Press UP and Down for 3 seconds to start this function in case of dark daylight or at night. Press UP and Down to shut off the backlight if not necessary.

Press UP or Down to switch the PAS level to change the output power from level 1 to level 5, with the default of level 1.
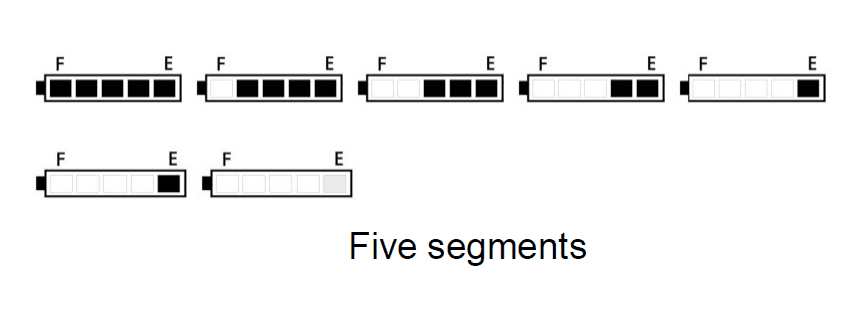
Five segments all are on when at full state. When it is at low voltage, the last segment will flash to warn the riders.
The display can show the current power of the motor as below:

When the system is wrongly working, the display will show the error code. Please find appendix 1.

Press Mode to start the display. Then press UP and Down to enter the settings
TC means clearance of a single trip. Please choose Y/N to operate with the default N. Y means yes and N means no. The clearance of a single distance and single trip time will work at the same time.
Single trip distance and single trip time will be reset at the same time.
![]()
Press Mode for short time, changing from ODO to a single trip. Then press Mode and Down for 3 seconds to clear the single trip distance and single trip time.
BL means backlight, ranging from level 1 to level 3. Please press UP and Down to change the brightness. The default is level 1, the minimum.

The optional sizes are:16inch、18 inch、20 inch、22 inch、24 inch、26inch、700C,28inch,29inch. Please choose the right size by UP and Down to ensure the correct showing of speed and distance. The default value is 26 inches.

The default speed limit is 25km/h. You may change it into a new value. That means when the bike exceeds that value, the motor stop outputting to protect riders.
The optional value can be from 12 km/ to 40 km/h through UP and Down.
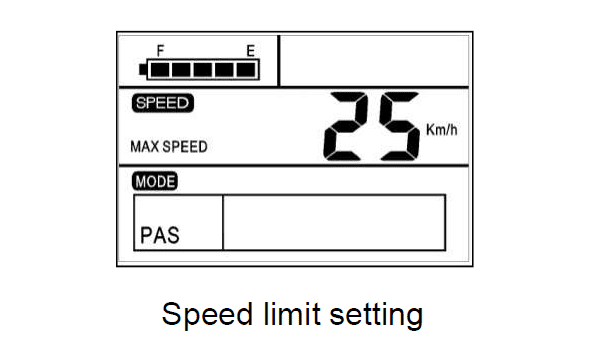
Note: speed limit can be a settled unchangeable value or a fixed value as default according to the local laws and rules.
When in setting mode, press Mode to confirm and enter the next setting. Press and hold Mode for a long to save the data and exit.
The display will exit from setting mode when no operation within 1 minute.
The display is with a USB port, used for mobiles, outputting 5VDC/500mA. When the display is shut, connect the mobile and USB port, then the display shows USB every 3 seconds to indicate the working state. If you shut the display at this moment, USB still works. Charging stops at any time you plug out your mobile phone.

Q: Why can’t turn on the display?
A: Please check if the cable is well connected to the controller.
Q: How to deal with the error code display?
A: Contact the e-bike maintenance station in time.
Q: what caused the malfunction when it shows error 30 on the display?
A: That means the abnormal communication between the display and the controller. Please try the suggestions below. If not helpful, please send the display to retailers or contact us:
We are not responsible for scratches or broken shells after the products are delivered from the factory.
We don’t repair scratched or broken lead wires.
The LCD display function warranty: 24 months from the delivery time of the display out of the factory.
Circuit diagram and wire sequence


| Item | Wire color | Definition |
| 1 | Red(VCC) | Power+ |
| 2 | Blue(Key) | Power of controller |
| 3 | Black(GND) | GND |
| 4 | Green(RX) | Receiving data |
| 5 | Yellow(TX) | Transmitting data |
Notes: some displays are with waterproof cables, and wires hidden inside the wire cover.
This operating instruction is general-purpose software (version V1.3). Some of the versions of the e-bike LCD may have slight differences, all with actual use versions.
Display return to normal only after the problem is fixed and the bike will not run before fixing the problem.
| Error code | Definition |
| 21 | Abnormal current |
| 22 | Throttle fault |
| 23 | Motor phase problem |
| 24 | Motor hall defect |
| 25 | Brake failed |
| 30 | Abnormal communication |
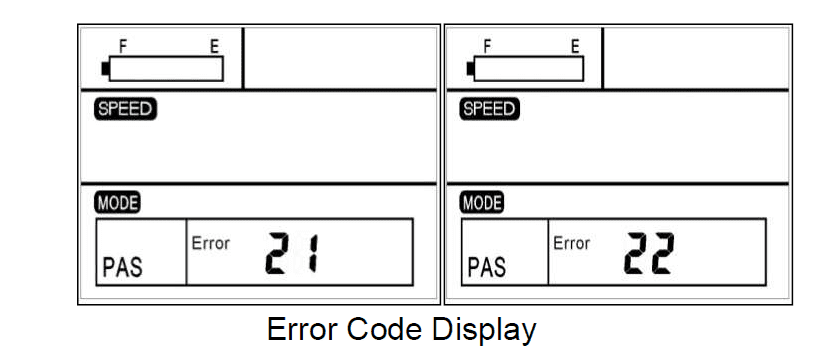
Note: Here is a more general error code for different e-system for your reference.